Are you looking for a seamless way to manage multiple logins across your business applications? Organizations using Microsoft 365, Azure, or other SaaS applications often require a unified authentication system to enhance security and streamline user access.
This is where Azure Active Directory (Azure AD) Single Sign-On (SSO) comes into play. Integrating Azure AD with Salesforce ensures secure and efficient authentication, reducing login friction while enhancing security and compliance.
Azure AD, a cloud-based identity and access management service, provides this capability, allowing employees to access external resources like Microsoft 365, the Azure portal, and Salesforce with a single set of credentials.
In this guide, we’ll walk you through the process of integrating Azure Active Directory with Salesforce SSO. We’ll cover key prerequisites, setup steps, testing methods, and the benefits of hiring top Salesforce consulting services from Cloud Analogy to ensure a smooth and secure authentication experience for your users.
Table Of Contents
- Who Uses Azure AD?
- Azure AD Licenses and Prerequisites
- Adding Salesforce App from the Gallery in Azure AD
- Configuring Azure AD SSO for Salesforce
- How to Create an Azure AD Test User
- Assigning the Azure AD Test User
- Configuring Salesforce SSO
- Creating a Salesforce Test User
- Testing SSO
Who Uses Azure AD?
Azure Active Directory (Azure AD) is widely used by:
IT Administrators
IT administrators widely use Azure AD to control access to apps and resources based on security and business requirements. It supports multi-factor authentication (MFA), conditional access, and identity protection.
2. App Developers
Developers use Azure AD to implement SSO for their applications, allowing users to authenticate using existing organizational credentials.
3. Microsoft 365, Office 365, Azure, and Dynamics CRM Online Subscribers
These users automatically have Azure AD tenants and can manage access to integrated cloud applications.
Benefits of integrating Azure AD with Salesforce SSO
- Seamless Access – Users log in once with Azure AD and access Salesforce without repeated authentication.
- Enhanced Security – Multi-factor authentication (MFA) and conditional access policies protect user credentials.
- Simplified User Management – Automated user provisioning and de-provisioning reduce administrative overhead.
- Improved Compliance – Centralized identity management ensures regulatory and security compliance.
- Better User Experience – Eliminates password fatigue, reducing login errors and support requests.
Azure AD Licenses & Prerequisites
Azure AD License Options
- Azure AD Free: Includes user management, basic reports, and self-service password change.
- Azure AD Premium P1: Offers hybrid access, dynamic groups, and on-premises password reset.
- Azure AD Premium P2: Adds Identity Protection and Privileged Identity Management.
- Pay-as-you-go: Available for B2C (Business-to-Customer) identity management.
Prerequisites
Before configuring SSO, ensure the following:
- You have an Azure AD subscription (a free account is available for learning purposes).
- You have a Salesforce SSO-enabled subscription.
Adding Salesforce App from the Gallery in AD
Step 1: Sign in to the Azure portal using a Work, School account, or personal
Microsoft account.
Step 2: Go to the left navigation pane and select the Azure Active Directory service.
Step 3: Next, navigate to Enterprise Applications and select All Applications.
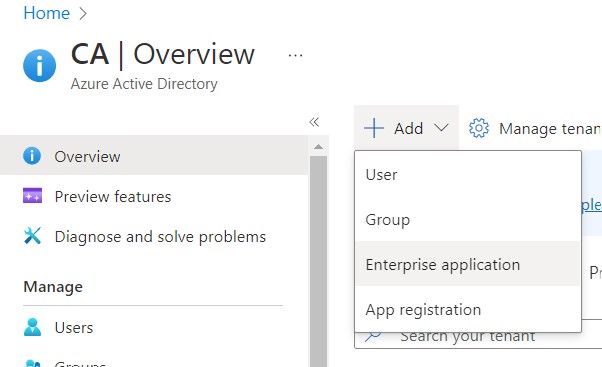
Step 4: Then, to add a new application, select New application.
Step 5: In the Add from the Gallery section, type Salesforce in the search box.
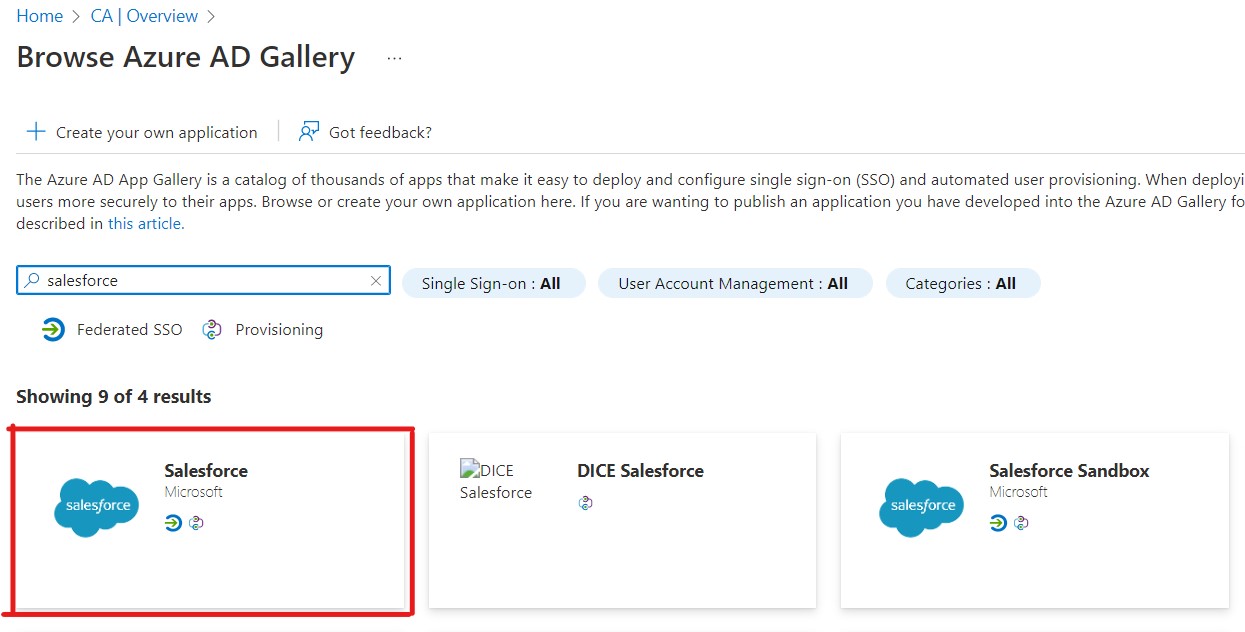
Step 6: Select Salesforce from the results panel and add the app. The app will be added to your tenant in a few seconds.
Configure Azure AD SSO for Salesforce
Configure Azure AD SSO with Salesforce using your test user. For SSO to work, you must establish a link relationship between Azure AD users and the related Salesforce users.
For configuring and testing Azure AD SSO with Salesforce, you perform the following steps:
1. Configure Azure AD SSO to enable users to use this feature.
- Create an Azure AD user – for Azure AD, a single sign-on with the user (Your. user).
- Assign the Azure AD user – to enable (Your user) to use Azure AD single sign-on.
2. Configure Salesforce SSO.
3. Test SSO.
- Configure Azure AD SSO
Follow the steps below to enable Azure AD SSO in the Azure portal.
Step 1:. Now, in the Azure portal, find the
Manage section and then select single sign-on – on the Salesforce application integration page,
Step 2: Then, select SAML on the Select a single sign-on method page, 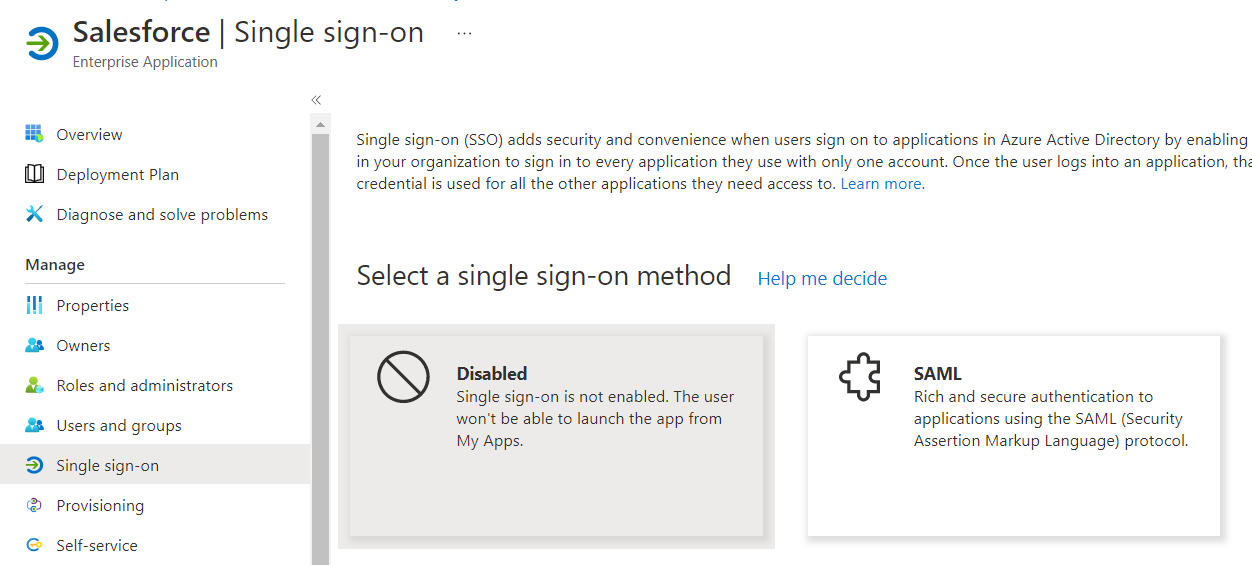
Step 3:. Then, use the Set up single sign-on with SAML page. Next, click the edit/pen icon for Basic SAML Configuration to edit the settings.
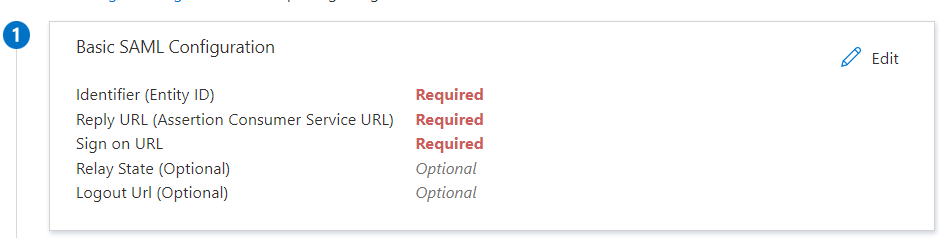
Step 4:. Now you must enter the values for the following fields in the Basic SAML Configuration section,
a. Type the value in the Identifier textbox by using the following pattern:
Enterprise account:
https://<subdomain>.my.salesforce.com
Developer account:
https://<subdomain>-dev-ed.my.salesforce.com
b. Next, in the Reply URL textbox, you type the value using the following pattern:
Enterprise account:
https://<subdomain>.my.salesforce.com
Developer account:
https://<subdomain>-dev-ed.my.salesforce.com
c. In the Sign-on URL textbox, you type the value using the following pattern:
Enterprise account:
https://<subdomain>.my.salesforce.com
Developer account:
https://<subdomain>-dev-ed.my.salesforce.com
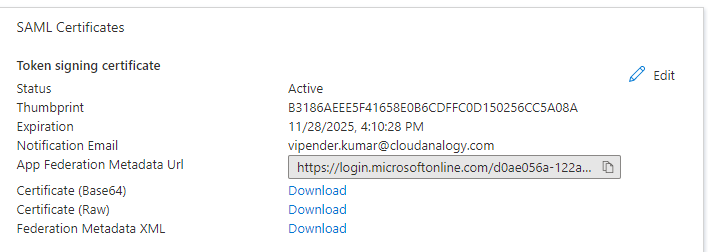
Step 5: Use the Set up single sign-on with SAML page. In the SAML Signing Certificate section, find Federation Metadata XML and. Then,ownload to download and save the certificate on your computer.
Steps to Create an Azure AD Test User
In this section, you learn to create a test user with the Azure portal named your user.
1. Next, use the left pane in the Azure portal to select Azure Active Directory, then select Users, and next, select All Users.
2. At the top of the screen, select New User.
3. Follow these steps In the User properties:
A. Use the Name field to enter “V Kumar” (your user name).
B. You enter the username@companydomain.extension by using the User name field. For Example, V.Kumar@CA.com.
C. Now, by selecting the Show password check box, write down the value displayed in the Password box.
D. Then click Create.
Assign the Azure AD Test User
In this section, you’ll enable your user to use Azure single sign-on while granting access to Salesforce.
- Use the Azure portal to select Enterprise Applications, and then select All Applications.
- Select Salesforce In the applications list.
- Next, on the app’s overview page, you will see the Manage section, from which you can select Users and Groups.
- Then select Add User, then select Users and Groups in the Add Assignment dialog.
- In the Users and Groups dialog, select your user from the list of users, then click the Select button at the bottom of your screen.
- When you expect a role to be assigned to the users, you can select it using the Select a role dropdown. You see the “Default Access” role selected without any role set up for this app,
- Now click the Assign button in the Add Assignment dialog.
2. Configure Salesforce SSO
You automate the configuration within Salesforce by installing the My Apps Secure Sign-in browser extension. Click Install the extension.

After adding a browser extension, click Set up Salesforce. You will be directed to the Salesforce Single Sign-On application. Next, provide the admin credentials to sign in using Salesforce Single Sign-On. The browser extension will now automatically help configure the application and automate steps 3-13.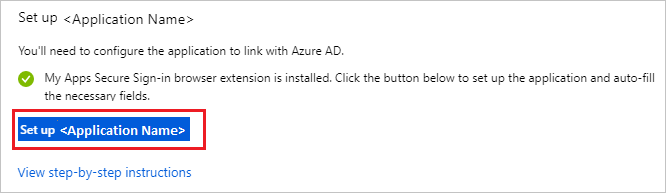
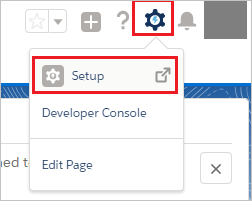
Open a new web browser window when you require a manual Salesforce setup. Then sign in to your Salesforce company site with the administrator credentials and perform the following steps:
Go to the Settings icon at the top right corner of the page and then click on the Setup under the settings icon.
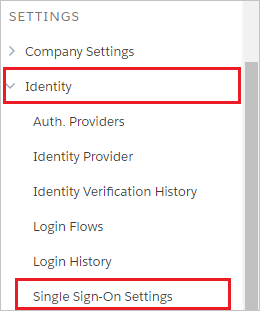
Now scroll down to the SETTINGS in the navigation pane, and click Identity to expand the related section. Click Single Sign-On Settings.
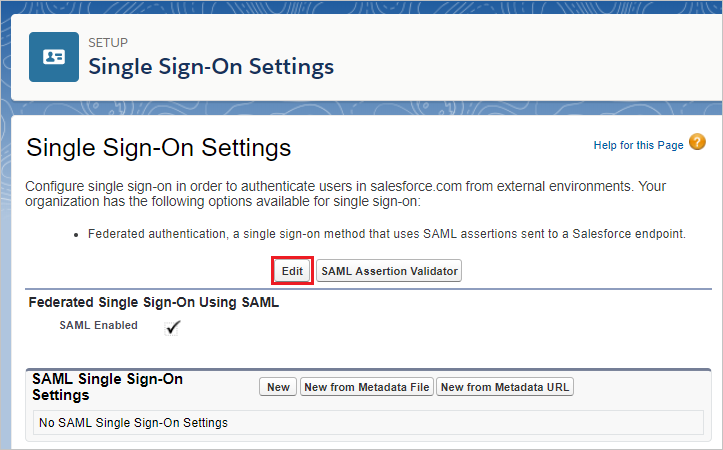
Click the Edit button on the Single Sign-On Settings page.
Note: Failing to enable the Single Sign-On settings for your Salesforce account, you may contact the Salesforce Client support team.
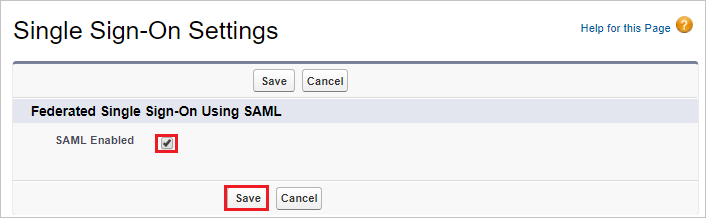
Then select SAML Enabled, and then click Save.
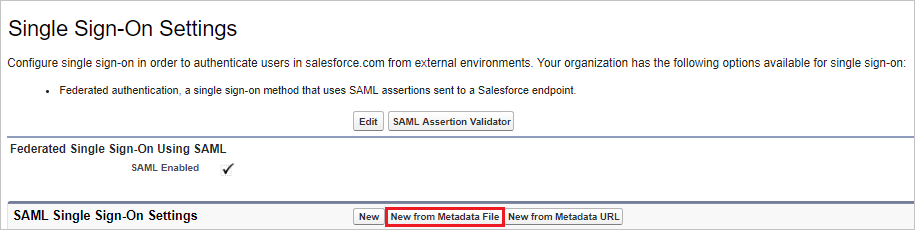
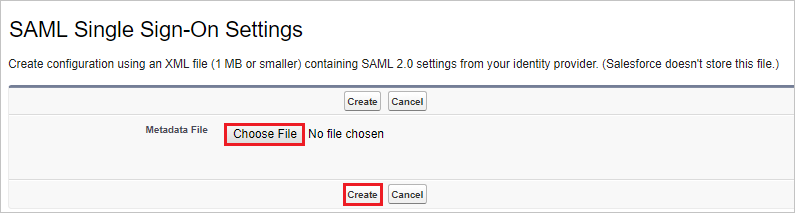
Now click New from Metadata File to configure your SAML single sign-on settings,
Next, click Choose File to upload the metadata XML file downloaded from the Azure portal, then click Create.
The fields populate automatically on the SAML Single Sign-On Settings page. If you want to use SAML JIT, then select the User Provisioning Enabled and SAML Identity Type since Assertion contains the Federation ID from the User object. Otherwise, do not select the User Provisioning Enabled and select SAML Identity Type since Assertion includes the User’s Salesforce username. Click Save.
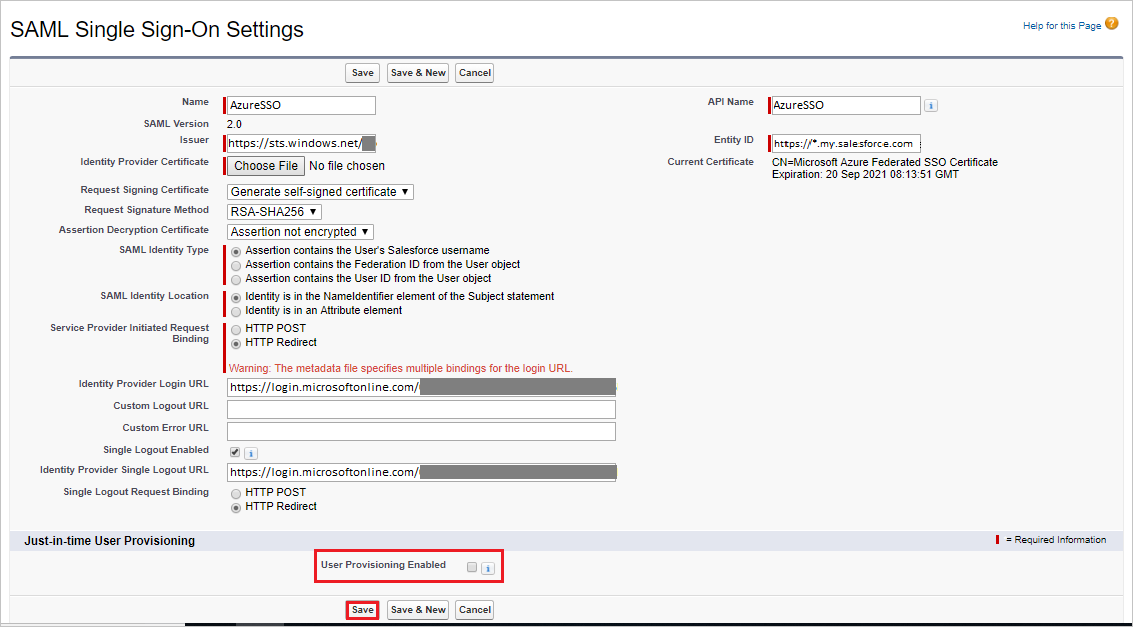
With more issues in getting users provisioned with SAML JIT, view Just-in-time provisioning requirements and SAML assertion fields. Moreover, with JIT failing, you might see an error “We can’t log you in because of an issue with single sign-on. Contact your Salesforce admin for help”.
Step 1: Use the left navigation pane in Salesforce and click Company Settings. Then expand the related section and click My Domain.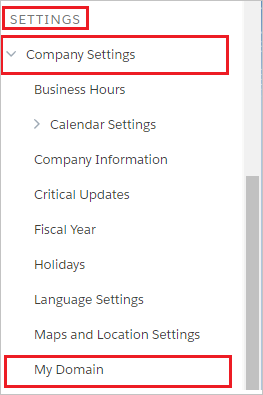
Step 2: Now, scrolling down to the Authentication Configuration section, click the Edit button.
Step 3: In the Authentication Configuration section, check the Login Page and Azure SSO as the Authentication Service of the SAML SSO configuration. Then click Save.
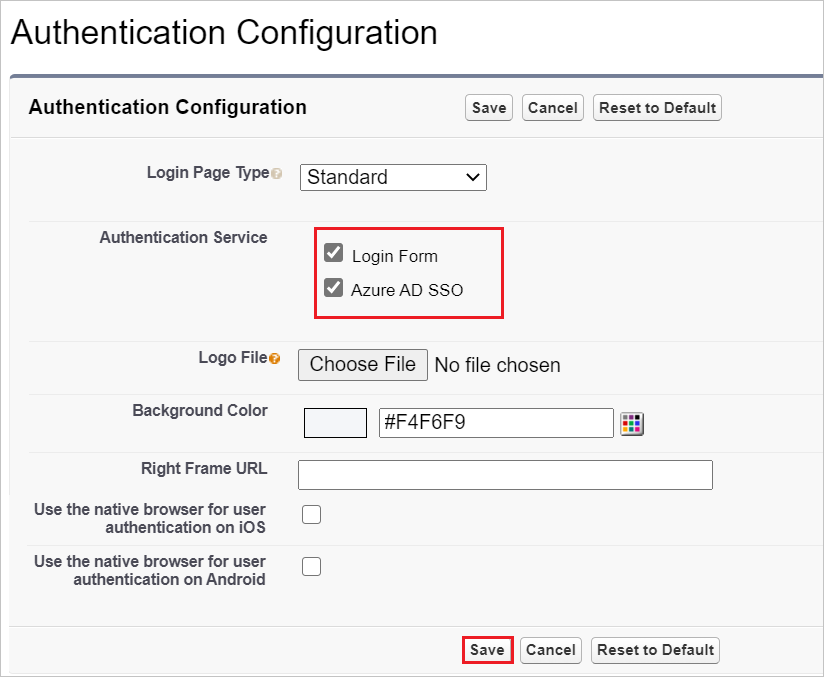
Note: Suppose you select multiple authentication services; in that case, users can choose which authentication service to sign in to while initiating a single sign-on to your Salesforce environment. When you don’t want this to happen, you must leave all other authentication services unchecked.
Create a Salesforce Test User
A user is created in Salesforce with this section. Salesforce is supportive of just-in-time provisioning, which is enabled by default. Besides, no action item exists for you in this section. If there is no existing user in Salesforce, a new one is created while attempting to access Salesforce. Also, Salesforce supports automatic user provisioning.
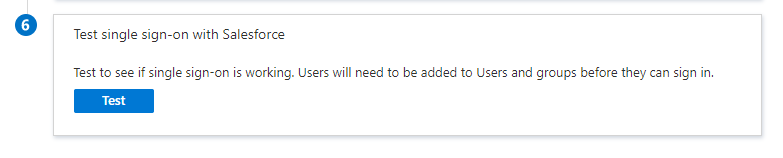
3. Test SSO
Here, you test your Azure AD single sign-on configuration using the following options:
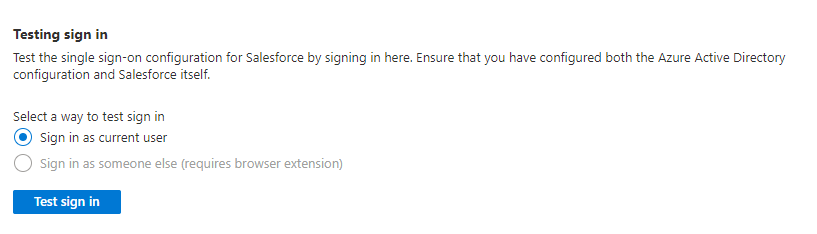
- Now click on Test this application in the Azure portal. It redirects you to the Salesforce Sign-on URL so you can initiate the login flow.
- After navigating to the Salesforce Sign-on URL directly, initiate the login flow.
- Next, you can use Microsoft My Apps. While clicking the Salesforce tile in the My Apps portal, you automatically get signed in to the Salesforce for which you set up the SSO. For further information about the My Apps portal, view Introduction to the My Apps portal.
If you log in to Salesforce successfully, your setup is complete.
Integrating Azure Active Directory with Salesforce SSO unlocks a seamless authentication experience, bolsters security, and optimizes user management. Businesses can enhance operational efficiency and data protection with streamlined access, automated provisioning, and compliance-driven security features.
By leveraging this integration, organizations can reduce administrative overhead, prevent unauthorized access, and provide employees with a hassle-free login experience. Whether aiming for a robust identity management strategy or maximizing Salesforce’s potential, this integration is a game-changer.
Unlock the full potential of your business with top-rated Salesforce consulting services from Cloud Analogy. From seamless CRM integration to tailored crm services, we help you streamline operations, enhance productivity, and drive growth. Whether it’s custom development, automation, or strategic consulting, our experts ensure you maximize the power of Salesforce.
Ready to transform your business? Partner with Cloud Analogy today and take your Salesforce efficiency to new heights.