Sharing is caring!
Are you wondering how to get the most out of your Email Marketing Strategy? Also, are you looking for the right steps to make your Email marketing campaign stand out from the rest? Then you have arrived at the right place.In this blog, we will discuss how you can deliver a rich customer experience with Salesforce and MailChimp Integration.
Salesforce Marketing Cloud is the platform for delivering relevant, personalized journeys across channels and devices, enabling marketers to deliver the right messages to the right people via the right channel. Unarguably, Salesforce Marketing Cloud is one of the powerful marketing tools, but it has its limitations.
If you are using a version lower than Salesforce’s Enterprise edition, your mass email limit will be 250 emails in a 24-hour period. The email limit is 500 a day in the Salesforce’s Enterprise edition and the limit is 1000 emails a day in the Unlimited Edition. That’s where MailChimp comes in the picture.
What is MailChimp?
MailChimp, a robust cloud-based platform, is the email marketing tool that enables you to send emails to numerous recipients at a time so that you can facilitate a delighting customer experience.
One of the biggest advantages of using MailChimp for Email Marketing is that it is easy-to-use and enables you to create HTML email templates without writing a single line of code. Furthermore, MailChimp is completely free to use. You can use this email marketing tool to send up to 2000 subscribers who are on your email list and send a total of 12,000 emails every month.
Integration of Salesforce with MailChimp
Integrating your Salesforce account with MailChimp allows you to import Salesforce contacts and leads to your MailChimp list, and view subscriber details and MailChimp campaign activity data in Salesforce. It also helps you keep track of all the emails from anywhere, anytime.
Benefits of Integrating Salesforce Account with MailChimp:
- Send new MailChimp subscribers into Salesforce with a specific object type;
- Select which Salesforce leads you’d like to go to MailChimp based on specific criteria and filters;
- Create a custom lead, contact, and campaign member queries that run daily or hourly;
- Manage MailChimp data storage options in Salesforce;
- View MailChimp campaign reports and campaign share reports from within Salesforce;
- Add custom MailChimp fields and VisualForce pages to the Contact and Lead pages.
Steps to Install and Configure MailChimp in Salesforce
Step 1: Go to Salesforce AppExchange and search “MailChimp for Salesforce” and then click on “Get it Now”.

Step 2: Now click “Install in Production”.
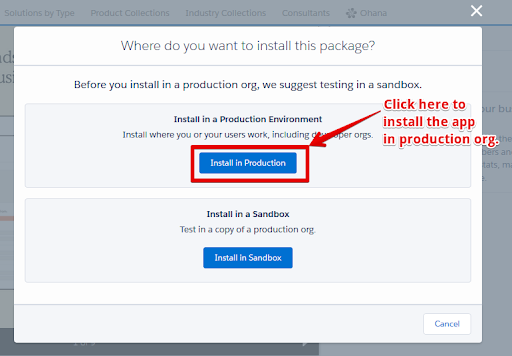
Step 3: Check the box “I have read and agree to the terms and conditions”, and click ‘Confirm and Install’.

Step 4: Choose the option Install for All Users, and click Install.
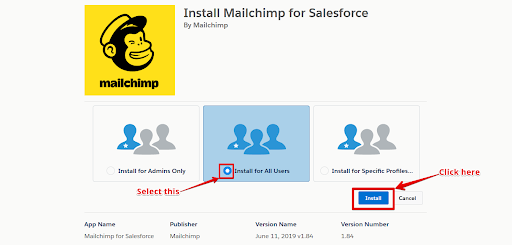
Step 5: In the Approve Third-Party Access pop-up window, check the box “yes, grant access to these third-party web sites” and then click “Continue”.
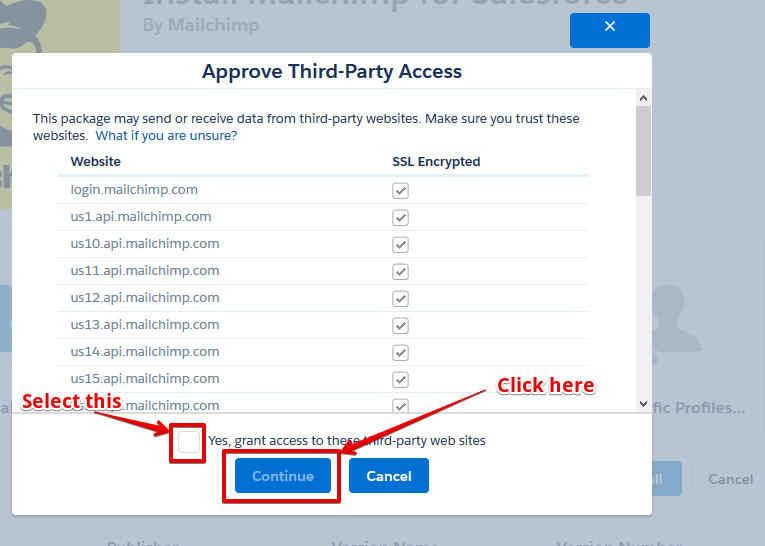
After the installation process is successfully completed, you need to connect your MailChimp account to Salesforce.
Step 6: Login to the production org, click on the App Launcher dropdown menu in the top right corner and choose MailChimp for Salesforce.
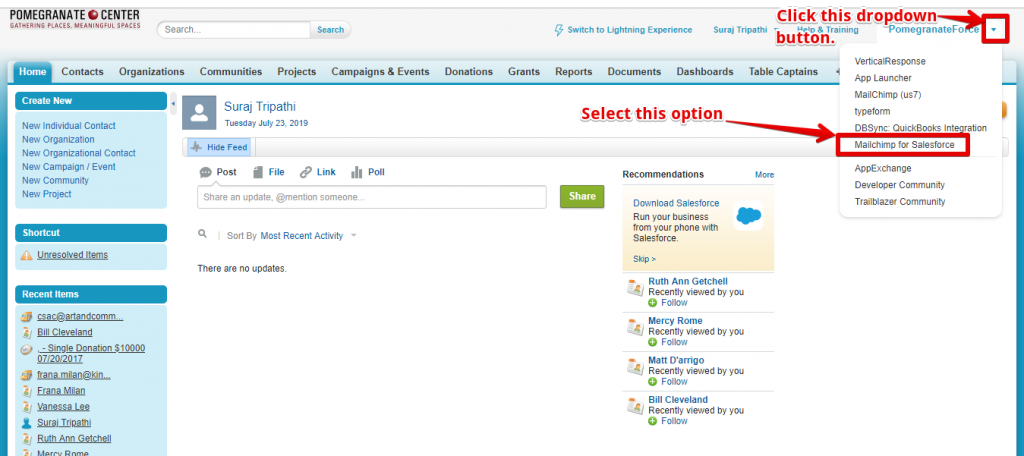
Step 7: In the MC Setup tab, click on the “Login” button.

Step 8: In the pop-up window, click OK.

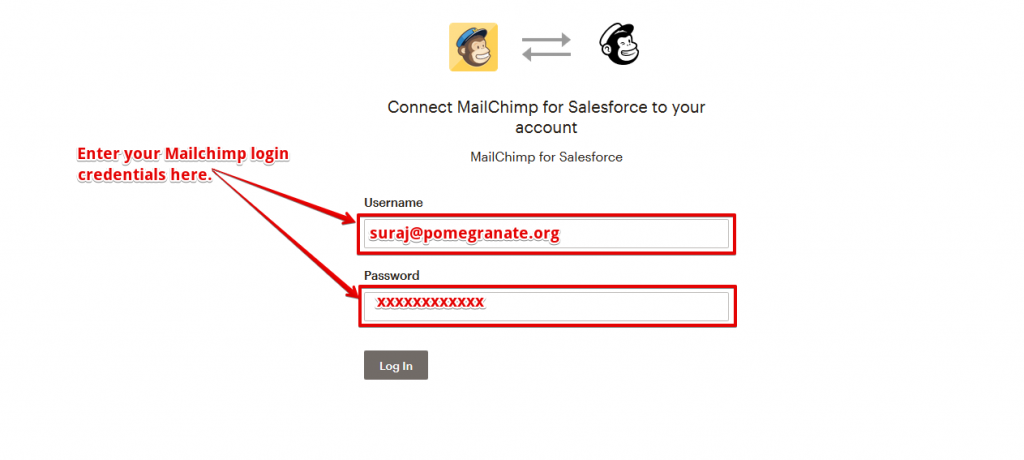
Step 9: Now input your MailChimp MailChimp username and password and click on login to connect your MailChimp account with your Salesforce org.
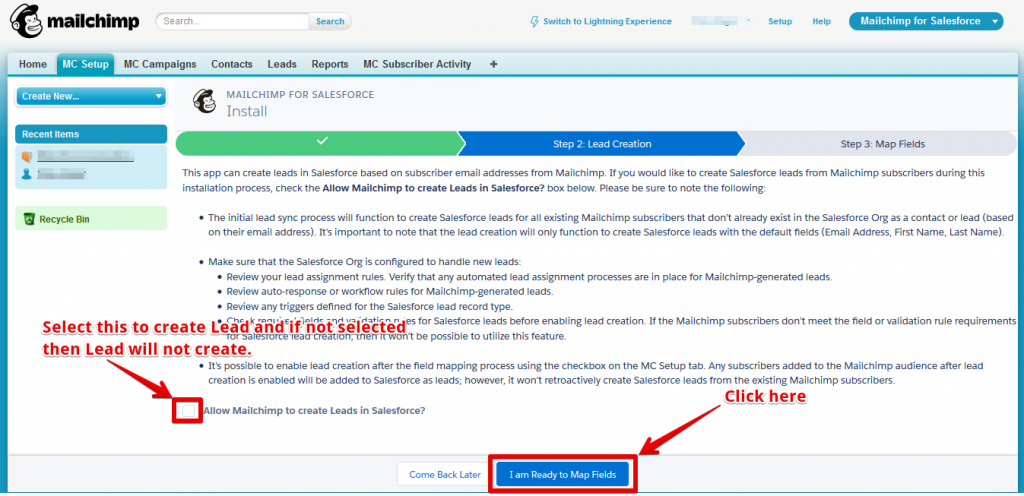
Step 10: Now open your production org and go to MC Setup. Check the box ‘Allow MailChimp to create Leads in Salesforce?’ and Click ‘I am Ready to Map Fields’.
Note: If you have not checked the box and directly clicked on “I am Ready to Map fields” button then Lead record will not be created in Salesforce.
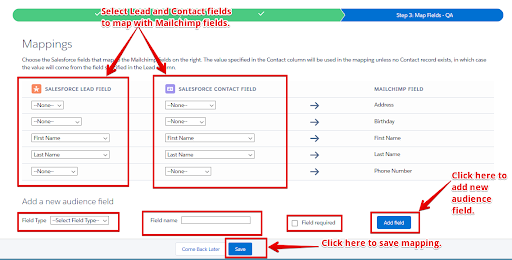
Step 11: To map your fields, click on the dropdown menus under Salesforce Lead Field and Salesforce Contact Field to match them to an existing MailChimp Field and then click Save.
Step 12: User can change the mapping by clicking the “map fields” in the Audience section of MC Setup.
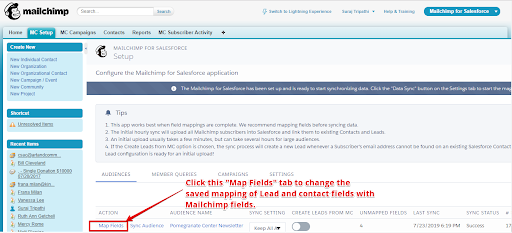
Step 13: On clicking Map fields, Mapping is shown as below. Here users can change the Lead and Contact fields and it will be mapped with MailChimp fields.

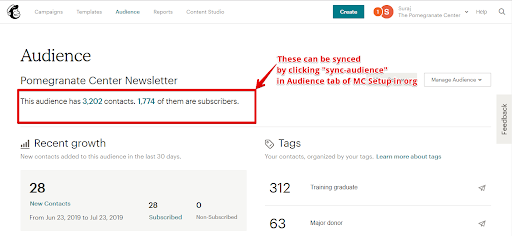
Step14: User can click “Sync Audience” in MC Setup to sync the details of the audience from the mailchimp.

Step 15: Log into your MailChimp account and you can verify the details shown here with audience details synced into your org.
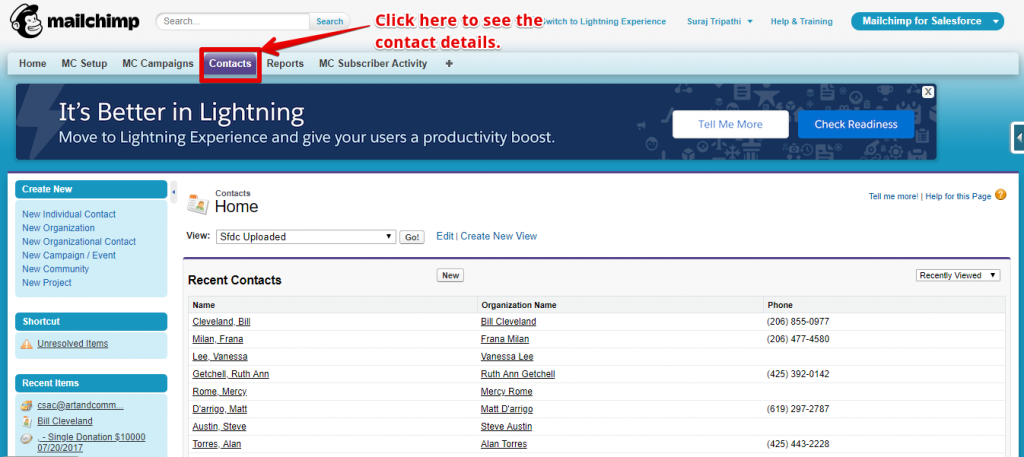
Step 16: User can also verify the details of Contacts by clicking the “Contacts” tab as shown in the below picture.
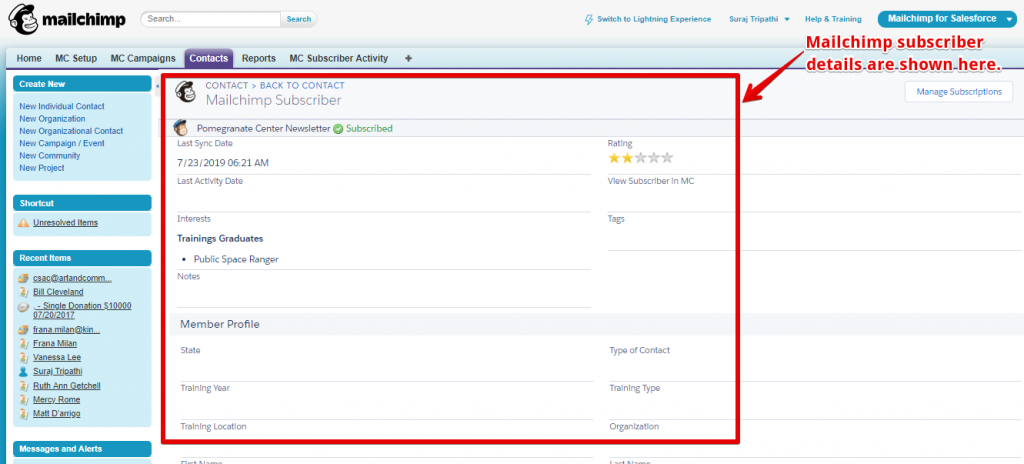
Step 17: Open any contact record and click the MC subscriber details to see its details.

Step 18: Contact’s MailChimp Subscriber details are shown below.
Conclusion
Salesforce Integration with MailChimp not only helps in syncing contacts or mass emailing but also allows you to keep track of subscribers and prospects. You can check the campaign status or member activities under the Salesforce tracking option. Furthermore, the campaign details are updated with the Salesforce in the real-time.
Cloud Analogy, the world’s leading Salesforce Implementation Partner, offers robust solutions for MailChimp integration with Salesforce to sync your MailChimp subscribers and Salesforce leads across platforms.
If you have any questions related to Salesforce Integration with third-party tools, our Salesforce certified experts would be happy to assist you.

Ajay Dubedi
CEO | Founder
Ajay Dubedi, the founder and CEO of Cloud Analogy, is a prominent Salesforce Sales, Service, and Marketing cloud Consultant with a rich expertise in handling challenging business models. Ajay has assisted and implemented solutions in industries comprising Banking, Health Care, Networking, Education, Telecommunication and Manufacturing. Ajay is globally acclaimed for his extensive experience in APEX Programming, VisualForce pages, Triggers, Workflows, Page Layouts, Roles, Profiles, Reports & Dashboards.Hire the best Salesforce Implementation Partner. Choose Cloud Analogy, the world's most preferred Salesforce Implementation Company that provides custom CRM Implementation services.


