Introduction
Jira is a suite of Agile work Management Solutions that helps collaborate across all teams – from concept to customer support. It helps to make life easier with its many products and deployment options that serve the purpose of IT, Software, Operations, and many more.
Jira Software is a family of products designed to help teams of all types manage their work. Initially, Jira was designed as a bug and issue tracker. But now, Jira has evolved into a powerful work management tool for all use cases, from requirements and test case management to agile software development.
This blog post will highlight why you should integrate Jira with Salesforce and how to make your first API call with the Jira Platform. With the synchronization of information between two powerful tools like Jira and Salesforce, teams collaborate and streamline communication. We also walk you through creating triggers for the customization of the synchronization based on your specific requirements.
Why Integrate Jira with Salesforce?
It is a collaborative world. Teams often copy and paste data manually between their tools. They spend much time on meetings, phone calls, and sending emails resulting in delays in sending data to and fro, manual data entry mistakes, misplaced or altered data, and wasted time and efforts of valuable resources.
So, it is wise to use a tool to help teams pass critical business information between them, which would not only streamline communication but also reduce the number of costly errors and allow teams to work on more important things.
The tool helps to get transparency in how teams collaborate and automate their business processes end-to-end.
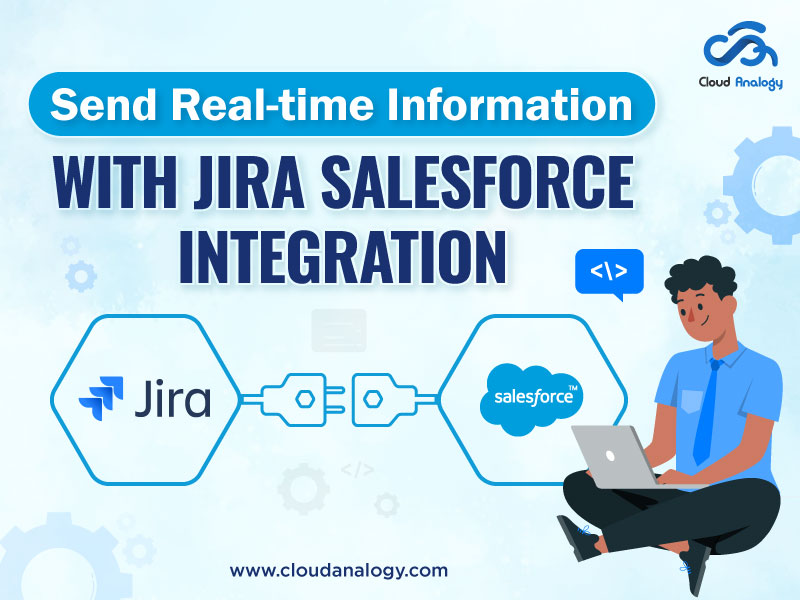
Due to the above reasons, it becomes vital to consider a Jira Salesforce integration where real-time information is automatically passed between sales and other teams.
The real-time data flow helps your employees decide where to focus based on these inputs obtained from sales or marketing teams. So. this integration can help your teams avoid working in silos and ensure that everyone has the correct and up-to-date information..
How to Make your First API Call with the Jira Platform?
Enabling OAuth 2.0 (3LO)
Before implementing OAuth 2.0 (3LO) for your app, you must enable it using the developer console.
- From any page on developer.atlassian.com, you can select your profile icon in the top-right corner and select Developer console from the drop-down.
- Select your app from the list (otherwise, create one if you don’t already have an existing one).
- Select Authorization in the left menu.
- Adjacent to OAuth 2.0 (3LO), select Configure.
- Enter the Callback URL. Next, set this to any URL that is accessible by the app. As you implement OAuth 2.0 (3LO) in your app, the redirect_uri must match this URL.
- Click Save changes.
Note if you haven’t finished adding an API to your app, you should do the following now:
- Select Permissions using the left menu.
- Now, next to the API you want to add, select Add.
Implementing OAuth 2.0 (3LO)
After enabling OAuth 2.0 (3LO) for your app, it is possible to implement it in your app’s code. There are some critical parts to this which are:
- Get the user directed to the authorization URL and get an authorization code
- Next, get the authorization code exchanged for an access token
- Now, authorize any calls to the product APIs using the access token.
Let’s have a detailed look at the above points one by one.
1, Direct the User to the Authorization URL and Get an Authorization Code
Your app starts the authorization flow by directing the user to the authorization URL:
| https://auth.atlassian.com/authorize?audience=api.atlassian.com&client_id=YOUR_CLIENT_ID&scope= REQUESTED_SCOPE_ONE%20REQUESTED_SCOPE_ TWO&redirect_uri=https://YOUR_APP_CALLBACK_URL&state= YOUR_USER_BOUND_VALUE&response_type=code&prompt=consent |
You can use the authorization URL in a GET request. Get this URL from your app in the developer console by selecting Authorization in the left menu, and Configure next to OAuth 2.0 (3LO). Otherwise, it is also possible to construct the URL manually (an example, if you want to specify scopes from multiple products).
Here are the query parameters for the authorization URL:
- audience: (required) This is set to api.atlassian.com.
- client_id: (required) Now, set this to the Client ID for your app. It is possible to find this in Settings for your app in the developer console.

- scope: (required) Next, set this to the desired scopes:
- It is important to separate multiple scopes with a space.
- You must only choose from the scopes that are already added to the APIs for your app in the developer console.
- If required, you may specify scopes from multiple products

- redirect_uri: (required) This is set to the callback URL that is configured in Authorization for your app in the developer console. If you are using the VF page for authorization, then use the URL of that page as a redirect URI, and if you use the aura component by embedding it in the app, then use that URL for redirect_uri.
- state: (required for security) This is set to a value associated with the user you are directing to the authorization URL. An example is a hash of the user’s session ID. It would be best if you ensured this value could not be guessed. It may be possible to generate and validate this value automatically if you use an OAuth 2.0 client library or an authentication library with OAuth 2.0 support.
- response_type: (required) This is set to code as you request an authorization code (not a token).
- prompt: (required) This is set to consent, so to help the screen prompt the user to grant access display.
If you succeed, the user gets redirected to the app’s callback URL, along with an authorization code that is provided as a query parameter called code. It is possible to exchange the code for an access token.
2. Exchange Authorization Code for Getting the Access Token
| curl –request POST \ –url ‘https://auth.atlassian.com/oauth/token’ \ –header ‘Content-Type: application/json’ \ –data ‘{“grant_type”: “authorization_code”,”client_id”: “YOUR_CLIENT_ID”,”client_secret”: “YOUR_CLIENT_SECRET”,”code”: “YOUR_AUTHORIZATION_CODE”,”redirect_uri”: “https://YOUR_APP_CALLBACK_URL”}’ |
- client_id: (required) This is set to the Client ID for your app. You can find this in Settings for your app in the developer console.
- client_secret: (required) This is set to the Secret for your app. It is possible to find this in Settings for your app in the developer console.

- code: (required) This is the authorization code received from the initial authorization call (described above).
- redirect_uri: (required) This is the callback URL configured for your app using the developer console.
If you are successful, this call returns an access token. This access token can be utilized to make API calls, as mentioned below.
3. Make Calls to the API by using the Access Token.
Now that your app has an access token that can authorize requests to the APIs for the Atlassian site. To make requests, you must do the following:
- Obtain the cloudid for your site.
- Construct the request URL by using the cloudid.
- Call the API using the access token and request the URL.
3.1 Obtain the Cloudid for your Site
It is possible to make a GET request to the following: https://api.atlassian.com/oauth/token/accessible-resources by passing the access token as a bearer token in the header for the request. For example
| curl –request GET \ –url https://api.atlassian.com/oauth/token/accessible-resources \ –header ‘Authorization: Bearer ACCESS_TOKEN’ \ –header ‘Accept: application/json’ |
It will help retrieve the sites with scopes granted by the token. Copy the id after finding your site in the response. This happens to be the cloudid for your site.
Here’s an example response:
[
{
“id”: “1324a887-45db-1bf4-1e99-ef0ff456d421”,
“name”: “Site name”,
“url”: “https://your-domain.atlassian.net”,
“scopes”: [
“write:jira-work”,
“read:jira-user”,
“manage:jira-configuration”
],
“avatarUrl”: “https:\/\/site-admin-avatar-cdn.prod.public.atl-paas.net\/avatars\/240\/flag.png”
}]
3.2 Construct the Request URL
Requests using the OAuth 2.0 (3LO) are made through api.atlassian.com (not https://your-domain.atlassian.net). Now, construct your request URL using the following structure:
where:
- {cloudid} is the same as the cloudid for your site that was obtained in the previous step. For example, 11223344-a1b2-3b33-c444-def123456789.
- {api} is the same as the base path and API name. An example is:
- /rest/api/2/project for the project endpoint in the Jira REST API.
- /rest/servicedeskapi/request for the request endpoint in the Jira Service Desk REST API.
- /rest/api/space for the space endpoint in the Confluence REST API.
Your request URL should appear like this (using the example cloudid and Jira API above:
| https://api.atlassian.com/ex/jira/11223344-a1b2-3b33-c444-def123456789/rest/api/2/project |
3.3 Call the API
It is possible to make the API call for passing the access token as a bearer token in the header of the request. This helps to authorize the request on behalf of the user.
| curl –request GET \ –url \ –header ‘Authorization: Bearer ACCESS_TOKEN’ \ –header ‘Accept: application/json’ |
A sample request will look like the below snippet:
| curl –request GET \ –url https://api.atlassian.com/ex/jira/11223344-a1b2-3b33-c444-def123456789/rest/api/2/project \ –header ‘Authorization: Bearer aBCxYz654123’ \ –header ‘Accept: application/json’ |
Conclusion
A synchronization between Jira and Salesforce can help teams collaborate and streamline communication. It also helps ensure data transparency across teams and lets everyone stay on the same page. Jira and Salesforce integration passes information between sales and other teams in real-time, automatically and consistently, to connect to the right people at the right time.
The real-time data flow results in improved decision-making on the focus areas based on inputs from sales or marketing teams. So. your team avoids working in silos and ensures that everyone has the correct and up-to-date information.Do you require someone to assist with Salesforce development, customization, implementation, data migration, and integration with third-party tools such as Outlook, MailChimp, Trello, Slack, Adobe Sign, and more? Contact Cloud Analogy – the globally recognized Salesforce integration company is here to cater to you with certified CRM experts who can help you with successful integration and improve your business’s bottom line like never before.