
Omni-Channel is a Salesforce feature that is Customer Service and Console based. It is a tool inside the Sales and Service Console that automatically sends work to users in real-time once configured.
Omni-channel supports leads, cases, orders, SOS video calls, custom objects, etc. The routing of all the work to the agents is based on the agent’s capacity, skillset, priority, etc. It gets the right work to the right agent capable of doing that work.
It can enable your customers to get support quickly and provide a personalized customer experience.
There is no need for custom development, but the configuration does everything. The outcome is that agents can now provide higher efficiency customer service, leading to better functional effectiveness.
Customers expect flexibility in the various means through which they get support. It provides a consistent experience and allows the service reps to handle customer issues through all channels.
Omni-channel offers a comprehensive customer experience and ensures your work stays unified, connected, and managed by your reps.
This blogpost will highlight setting up the Omni- Channel in a Salesforce association.
What are the Steps to Set up the Omni-channel to Console?
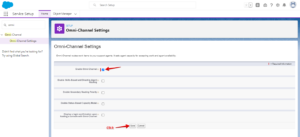
Step 1: First, users have to enable the Omni-Channel features with the following:
Customize > Omni-Channel > Settings to enable features.

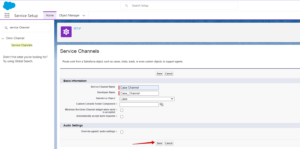
Step 2: Create a Service Channel by navigating to Customize > Omni Channel > Service Channels > New.
Next, enter a Service Channel name, and then Salesforce objects are associated with Service Channel. Click the Save button.


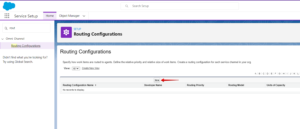
Step 3: Create a Routing Configuration by navigating to Customize > Omni Channel > Routing Configurations > New

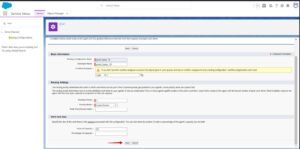
Step 4: Enter the Routing Configuration name, Priority order, Routing model, and Units of Capacity or Percentage of Capacity, then Click the Save button.

Step 5: We need to attach this configuration with a queue. So, navigate to Manage Users > Queues> New.

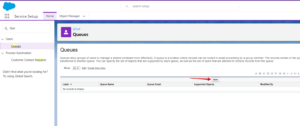
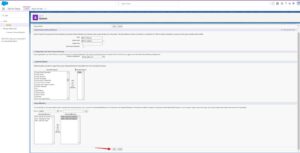
Step 6: Now, we will assign a User and Object for the Queue. Then, select the Routing Configuration you want to associate with the same queue. And click on the Save button.

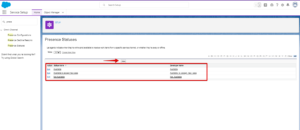
Step 7: Create a Presence Status by navigating to Omni channel > Presence Statuses > New
Enter the Status name, API name, and Status Options, and select a Service Channel.

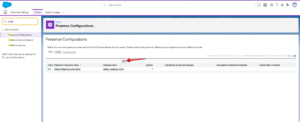
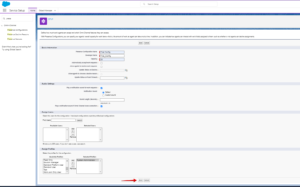
Step 8: If you need to create a Presence Configuration with different profiles and users, you have to create a new configuration by navigating to Customize > Omni-Channel > Presence Configurations > New
By default, Salesforce created a Default Presence Configuration, which you can implement easily for the default profile or create the new one.

Step 9: Enter a Presence Configuration Name and capacity of the agents. Select whether the given requests are automatically accepted. When you choose this option, you will not be able to select Allow Agents to Decline Requests. On selecting the Allow Agents to Decline Requests option, you can’t choose the Automatically Accept Requests option.

Step 10: Grant users access to Presence Statuses permission in Profiles by navigating from Setup > Manage Users > Profiles.
Step 11: Click the Profile you want to give access to presence statuses.
Note: Don’t click the Edit button on the profile name; otherwise, you won’t see the option.
Step 12: Click edit on Enabled Service Presence Status Access.

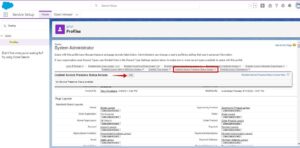
Step 13: Select the Presence Status to be included in the Profile, and then click save.


Step 14: Add the Omni-Channel Component to the Console by navigating to the Build Section.
Create –> Apps (Console App) and Click Edit.
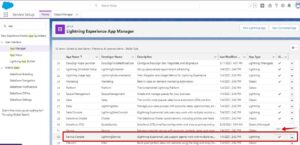

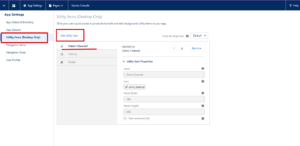
Step 15: Add Omni-Channel to selected items from the Utility Item(Desktop Only) section and Click Save.

Step 16: Navigate to Service Console & on the Console page, you will see the Omni-channel box in the bottom left corner.
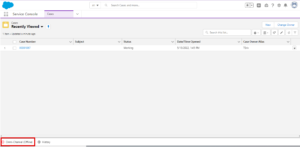

Step 17: Open it and click the status you created in Presence Status.


Whenever a Case is assigned to the Queue, it is automatically routed to an agent by Omni–Channel.


Step 18: After accepting the routed work Item, click the Refresh icon in Console’s list view.
Here, you can see that the Case owner has assigned to the user who accepted the work Item.
Conclusion
Salesforce Omni-channel is a flexible and customizable feature configured declaratively and requires no code. When customer service adopts an omnichannel approach, your clients will become happy.
It allows your customers to connect with your service reps seamlessly by using multiple channels. So, your service reps gather a holistic picture of their clients.
With an omni-channel contact centre, cases get routed to the right agents capable of doing that work. Due to the platform’s productivity and intelligence tools, the agents can deliver personalized and proactive services across various channels and devices.
If your clients want to connect with your workforce seamlessly using multiple channels, then omni-channel fits perfectly. Cloud Analogy, one of the leading Certified Salesforce Consulting companies, will guide you with their business advice on the benefits of omni-channel.
We offer affordable Salesforce Consulting services to grow your business in various ways and act as your trusted Salesforce consulting partner. Reach out to our expert and certified team at Cloud Analogy and start your project.