A lead is typically someone who has expressed interest in a product or service and has provided some contact information, such as their name or email address to get back to them.
Further, the provided information can be entered manually, imported, or can be captured from Web-to-Lead Forms. Leads contain both organization and contact data.
In Salesforce, leads get assigned to sales reps who, during the sales process, convert them by creating a new account, contact, or, optionally, an opportunity.
In this blog, we will tell you about Data Loader, Lead Assignment Rule, and how to assign a Lead Using Data Loader.
What is a Data Loader?
Data Loader is a software that helps in the high-volume import, export, and storage of Salesforce data. It is a tool from Salesforce through which you can Insert, Update, Upsert, Export, or Export all data in bulk.
Data Loader is used instead of Import Wizard in Salesforce because import wizard manages only simple records (maximum 50,000 records), but Data Loader manages complex data imports.
- By utilizing Salesforce Data Loader, you can stack up to 5,00,000 records.
- The Salesforce Data Loader supports all the Standard and Custom objects.
Now, let us try to understand the Salesforce Lead Assignment Rule.
Lead Assignment Rule
Salesforce Lead Assignment Rules automatically assign any lead record to a specific user or queue based on various circumstances.
They consist of rule entries that decide the assignee of a lead. You can create as many assignment rules as you want, but only one can be active.
For the most part, they are utilized at the specific moment when a Lead is generated (regularly by Web-to-lead or an integrated marketing automation platform like Hubspot, Marketo, or Pardot in Salesforce Pardot Services).
They could additionally be called some other time on a current lead by a user or through a tool like Data Loader.
Next, we will learn how to assign a Lead Using a Data Loader.
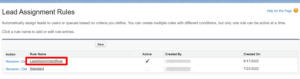
How to Assign a Lead Using a Data Loader?
Here are the steps below on how to assign a lead using Data Loader:
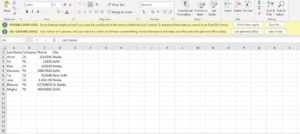
- Create a CSV file which contains all the Information about Lead.

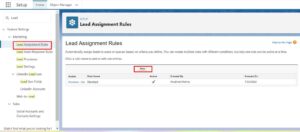
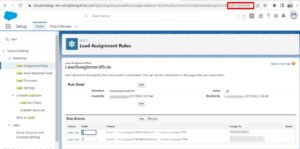
- Login to the Salesforce org and create a Lead Assignment Rule. Click on New Button and give the name of the Assignment Rule and check the Active checkbox.


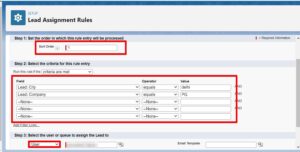
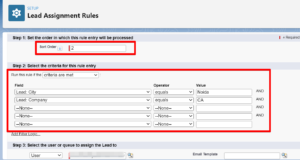
4. Click on the created Assignment Rule and create a Rule Entry and give the specified condition.

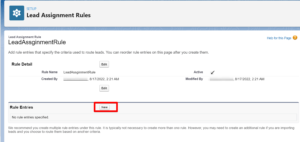


5. Copy the Assignment ID from the URL.

6. Now Go to the Data Loader and Click on Settings.

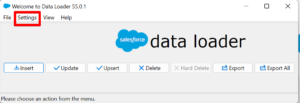
7. Paste the Lead assignment Rule ID in the Assignment rule section.


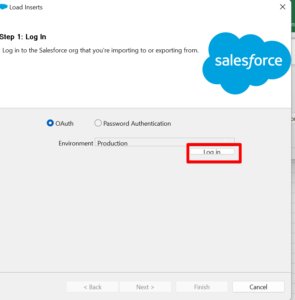
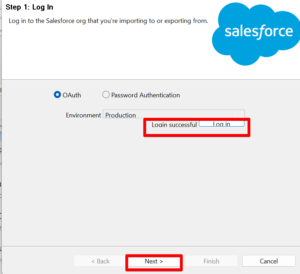
8. Now Login into the Data Loader with your Salesforce org credentials.


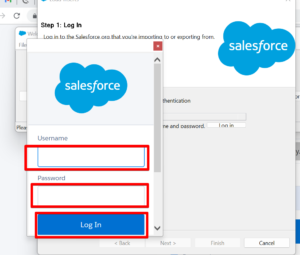
9. Click on the Allow button, and it will Login successfully.


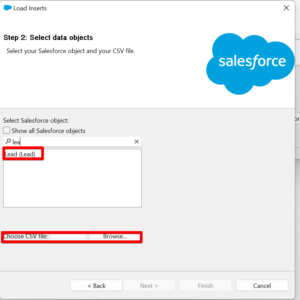
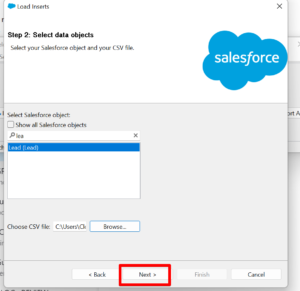
10. Search Lead as an Object and Click on Lead object and Click on Browse Button and then Click on Next Button.


11. Click on Ok Button.


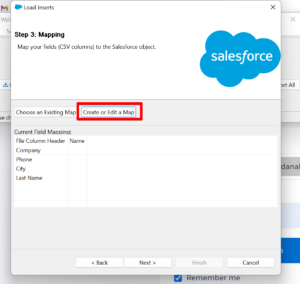
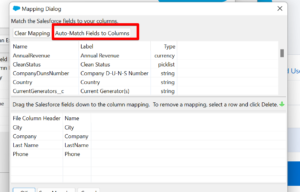
12. Click on Create or Edit a Map or Choose an existing map button to Map fields and Click on Ok Button.


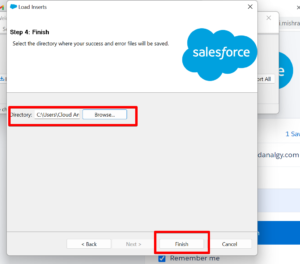
13. Click on the Finish Button after giving the Directory.

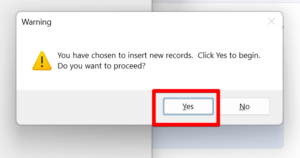
14. Click on Yes Button.

15. Now Click on Ok Button.


16. Now move to Salesforce org and click on Lead Object to see all the records, then open the record and go to detail to see the Owner of the Lead.


Conclusion
Data Loader is a simple and efficient way to assign leads in Salesforce. You can easily upload, update, and segment your leads using Data Loader, ensuring they are properly assigned to the right owners and segmented for future follow-up.
Your sales team’s efficiency can easily improve by following the steps outlined in this blog, resulting in higher conversions and revenue growth for your business.
Do you want to use a tool to manage complex imports of data in Salesforce?
Cloud Analogy, one of the top Salesforce Consulting firms, with a team of Competent, Certified Salesforce professionals, can provide affordable Salesforce Consulting services to grow your business in various ways and act as your trusted Salesforce consulting partner.
Reach out to our expert and certified team at Cloud Analogy and start your project today.