Managing data flow between AWS and Software-as-a-Service (SaaS) applications like Salesforce may be challenging, time-consuming, and costly. Custom integrations that allow developers to transport data between AWS and Salesforce might take months to write. These integrations can be expensive, and each time the data requirements change, developers must make complex changes, which can drive up expenses even higher.
Some businesses without the necessary engineering resources may find themselves manually importing and exporting data, which is even more time-consuming. Further, it is prone to human mistakes and even poses a danger of data leakage.
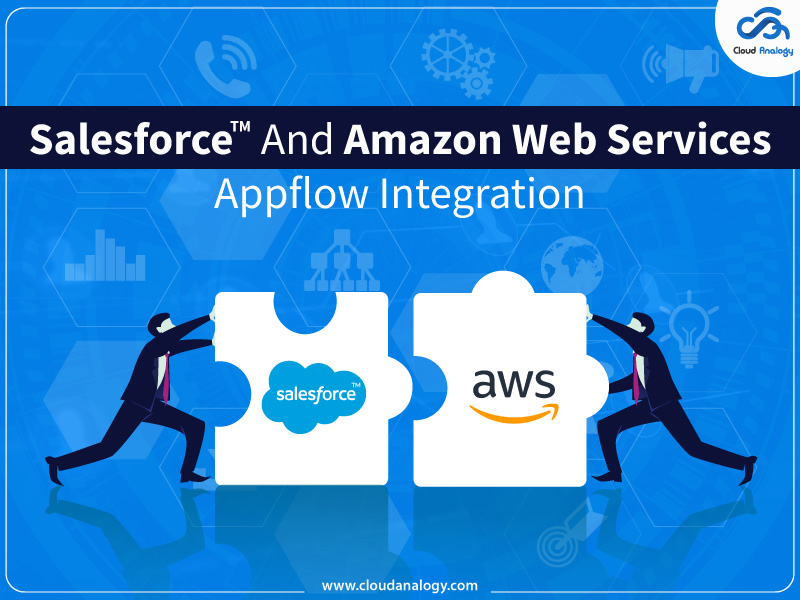
To solve all such problems by offering extensive and user-friendly features, Amazon Appflow is here for your rescue. Here in this guide, you will be getting acquainted with all the features that will allow developers to transfer the data from one platform to another seamlessly.
Introduction To AWS
Amazon Web Services (AWS) is a comprehensive cloud computing platform provided by Amazon that comprises a mixture of Infrastructure as a service (IaaS), Platform as a service (PaaS), and packaged software as a service (SaaS) offerings. AWS services offer various organization tools such as compute power, database storage, and content delivery services.
Introduction To AWS AppFlow
Amazon AppFlow, a fully managed integration service, enables you to securely transfer data between Software-as-a-Service (SaaS) applications, including Salesforce, Zendesk, Slack, ServiceNow, and AWS services like Amazon S3 and Amazon Redshift, in just a few clicks. AWS AppFlow is a codeless integration for business users that focuses on empowering non-technical users to integrate their siloed data sources. It provides the ability to exchange data between AWS services and other SaaS applications without writing a single line of code.
Benefits Of AWS AppFlow
- Speed and agility: Amazon AppFlow allows you to integrate applications in just a few minutes without waiting days or weeks to code custom connectors.
- Privacy and security: AppFlow encrypts data at rest and in motion. You can encrypt data with AWS-managed keys or bring your custom keys.
- Scalability: AppFlow easily scales up without the need to plan or provide resources to help you move large volumes of data without breaking it down into multiple batches.
- Reliability: AppFlow uses a highly available architecture with redundant, isolated resources to prevent any single points of failure while running within the resilient AWS infrastructure.
Steps To Signup In AWS Console
Step 1: Register the Account.
Click on this link to register https://portal.aws.amazon.com/billing/signup#/start.
The below screen appears when you click on this screen:
Create the account by filling in all the required information, then submit your form. When you submit your form, then a mail is sent to your mail address.
After entering all details on the Signup Page, you’ll get an Email on Entered Email Address. Then, you need to click on Verify your email Address button to confirm your Registration.
Steps To Login In AWS Console
After Signed up Successfully, go to this URL for Login – https://aws.amazon.com/console/.
After linking here, this will redirect you to another page for entering registered Email ID & then the password.
Then, enter the registered email address here & Click Next.
After entering the registered Email, now entered the password here & click the Sign in Button.
Enter the Characters same as shown in the Image for Security Check.
After Successful Login, You’ll get redirected to this Page.
For Integrate AppFlow with Salesforce, you must have an Account on Salesforce for this visit this link – https://login.salesforce.com/ & either Signup or Login to Salesforce Org.
Steps To Create A AWS S3 Bucket
First, search S3 in the Search Bar at the top, then Select S3 from the visible List.
Now, you’ve to create a Bucket here in AWS. And you can store the data coming from Salesforce. Buckets are containers for data stored in S3.
Enter the Bucket’s Name here; remember this must be unique so that no one can create a bucket of the same name.
Now, you’ve to select the AWS region from here. This will be better if you choose the Nearest Region. Just like, I’m taking Asia Pacific(Mumbai) ap-South-1 as its Nearest to my Location.
Leave all the other fields as it is & click on the create bucket button on the bottom.
Just after clicking on the create bucket button, your bucket will be made.
How To Create A AWS AppFlow
Now, search AppFlow on the AWS management console search button.
Here on Search Layout, Click on Amazon AppFlow
After clicking on the Amazon Appflow, you will be redirected to this page.
Now, to create a Flow, you’ve to Click on Create Flow Button.
You’ve to enter mandatory fields about the AppFlow here.
You have to enter the following details on this page-
- Name of the Flow (Mandatory)
- Description About the Flow (Optional)
- Tags (Optional)
(Here, I have named this AppFlow as SFTask and added the Description – To Migrate SF Tasks having Related Contacts Only)
After that, click on the Next button at the bottom of the Page.
Now, you’ll be redirected to a new Page as below –
Here, You’ve to select Salesforce as Source Name:
Now, for Salesforce Connection, Click on it.
Now, click on Create New Connection.
After Clicking on Create New Connection, This Pop-up will Open & there You’ve Either to Click Production or Sandbox wherever your Data is located.
Steps To Integrate AWS & Salesforce
I’ve selected production as My Data is there in Production Org. After Selecting, Production Now, you’ve to Enter a Connection Name & Then Click Continue Button.
After clicking on the continue button, now another Pop-up will appear on the screen like below.
Here, you’ve to enter Salesforce Credentials:
- Enter the Username of Salesforce Org
- Enter the Password of it
- Click on Login Button
Now, you’ve to click on allow button to access & manage data & basic information to AWS.
After that, you’ll be redirected to the below screen:
At this screen, if you’ve to Select Salesforce Object or Salesforce Event, If your Data is in Object, then select Object if it’s in Event, then Select Event.
My Data for Migrate is in Task Object, So I’ll choose Object here & then in List I’ll Select Task(as Image Below)
Now, You’ve to Select the Destination – This’ll be any Destination Tool wherever you want to Store the Data of Salesforce.
Here, I want to save my data in Amazon S3, so I selected that Amazon S3.
You have to choose the S3 Bucket in which you want to Store the Data(Record) of Salesforce Object.
Here, I want to store records in Salesforce.task2 Bucket, So I selected that.
Now, click on additional settings & more options will be shown to you, such as Like Data format preference, Data transfer preference, etc.
I want to get my Record from S3 in the CSV Format, So I selected that. If you wish to have data in any other Format, choose as per your preference.
If you want to Add Timestamps on File & Folder, then you can Add by Here(It’s Not Mandatory)
To Run the Flow, there are 2 options either to run it Immediately or to run as per your Schedule.
Here, I want to Run my Flow. So, I’m choosing Run on Demand & Click Next.
The Next Step is to ; NowMap Field Details, Here, you’ve to Select Field Mapping for the Object Either you can choose them Manually(as per AWS mapping), or If there is any specific mapping, you can upload your CSV file of Mapping.
I’ve chosen Manually Map Fields, Now you can use Either Map All Fields directly(This will Map all Fields at Once & in Data you’ll get Blank Column wherever Data isn’t there, or you can Select Fields One by One)
After Selecting All Fields Directly Task’s 40 Fields are Mapped Now
If you want to Select any Validation to Filter Records as per your choice, you can Select them From here.
I’ve Insert Validation. If there is no Related Contact to Any Task, then That Task will be Ignored & will not be Migrate to AWS from Salesforce. Then, click next.
The Next Step is to Add Filters:
Here, you can apply Filters as per your Choice & then Select Next.
The Next Step is to Review the Flow:
Here, you can review everything, whichever is in Flow; if somehow anything is wrong, you can go to the previous step & change or apply anything or create a Flow Button on the Bottom.
So, Our Flow is Created Now – All Details of the Flow are in it
To run the flow, you can simply press the run Flow Button on the top right.
Records In Salesforce
There are 10 Records in Task Object in Salesforce, out of which only 7 have Related Contacts in it. We allow a Validation to Insert those records only which have related contacts.
So, here in S3 Bucket, Instead of migrating all 10 Records, there’ll be a migration of Only 7 Records with related contacts.
So, let’s continue to AWS & run the Flow:
Here you can see the flow is running successfully; your.
Now to go to the S3 Bucket, click on the Link here & then you’ll be at S3 Bucket where the Data is.
After clicking on the S3 Bucket Link, the below screen appears-
Click on the Object displayed
This Object contains all the records which migrated from Salesforce. If you click on this, you’ll get details of it.
To get the records, select that Object’s Checkbox & then Click Download Button; your file will be downloaded in the system.
The File is Downloaded. Open the file in MS Excel.
Checking Of Records In AWS
Here is the screen we got after opening the Downloaded File in Excel.
There are 7 Records here. As per the Validation we Made in AWS Appflow to get records that have Related Contacts Only.
We are successfully Integrate Our AWS with Salesforce Object. Now, whenever you want to update the Record in S3 Bucket, You simply have to Run the Flow & Download the latest File from S3 Bucket.
Conclusion
AppFlow is a managed integration tool that enables developers to securely transmit data between SaaS applications such as Salesforce and AWS services. Users can run flows on-demand, plan them, or have them triggered when launching a campaign, converting a lead, closing an opportunity, or creating a case when Salesforce is integrated with AppFlow. If you also want to take advantage of Amazon AppFlow integration with Salesforce, follow the steps mentioned above and transfer your data without hassles.
Are you looking for the top Salesforce app development company that can help you build highly customized Salesforce apps? Contact Cloud Analogy, the world’s leading Salesforce consulting company that offers a wide range of Salesforce consulting services to help your business grow and succeed faster.


