Salesforce is the # 1 CRM in the world and is a cloud-based software that enables your business to unite your sales, marketing, and commerce teams with its customer 360-degree platform as an integrated CRM platform, from anywhere to keep the customers happy with exceptional customer experience, everywhere.
What Are Quickbooks?
Quickbooks is accounting software for your small business which allows you to create and send invoices, track sales and inform you about how business is doing at a point in time, with accounting data reading in the cloud.
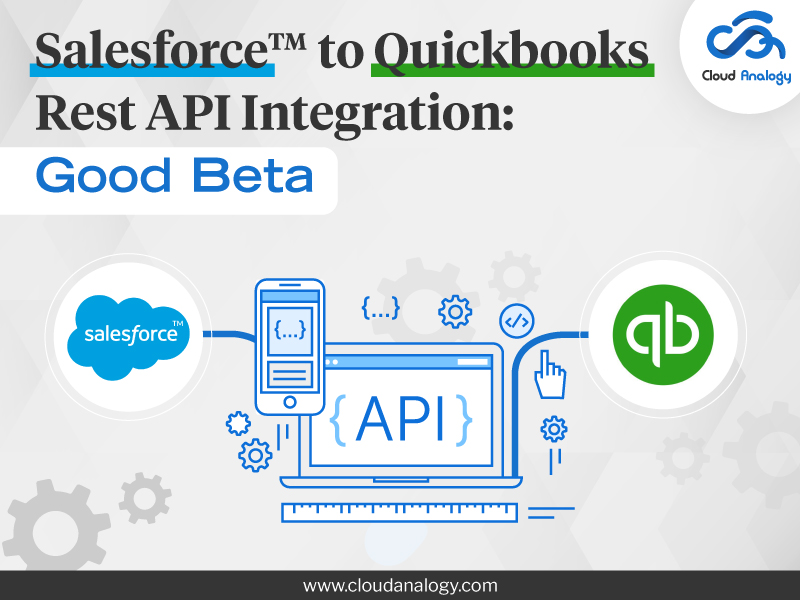
Why Integrate Salesforce With QuickBooks?
QuickBooks with Salesforce integration provides complete visibility into how well your business is doing and what are areas of improvement. The two software works collaboratively to share data between your sales and accounting teams such as sales orders, customer information, expenses, and invoicing. The integration helps to reduce duplication of data, improves productivity, and provides insights to achieve better forecasting.
This guide describes how to make your first API call with the QuickBooks Online App.
What Are The Steps?
- Create An Intuit Developer Account
Sign up for a new Intuit Developer account or sign in with any current Intuit product account such as QuickBooks, TurboTax, Mint, or ProConnect, as shown in the below figure.
You can sign up for a free account from the below link:

| Note: When you create an Intuit Developer account, a QuickBooks test company called a sandbox company is created automatically. |
View your sandbox company here.
You can start exploring QuickBooks Online APIs right away through the API Explorer.
- Create An App
Creating an app generates your development keys. Use the app for yourself, your clients, or make it available to all QuickBooks users by listing it on the QuickBooks App Store.
- Sign into the developer portal. From the menu, at the top-right, as shown in the below figure, select Dashboard.

- In the My Apps Dashboard, create a new app by clicking the + Create an App button, under the ‘Apps’ tab.

- Select QuickBooks Online and Payments, as shown in the below figure.

- Give your app a Name and select the required scopes from the Select Scopes dropdown, as shown in the below figure. Select the team that you want to create your App in. Then click Create App.


| Note: You need permission from the team admin to create apps for a team. |
- In the left sidebar, find Development and Production keys. Under Development select Keys and OAuth, as shown in the below diagram.


- Locate your Client ID and Client Secret, as shown in the below diagram.


You need your Client ID and Client Secret in the next step to generate an OAuth 2.0 Access Token. Your app needs an OAuth 2.0 Access Token to access QuickBooks Online data.
- Get An OAuth 2.0 Access Token
To generate an Access Token using Postman visit the following link:
For getting an AccessToken in Salesforce, first, create a custom object with any name you like. Here, we have already created an object for LinkedIn integration. So, instead of creating a new object, we have used it and if you have an object with the following fields with API names, then you can also use it instead of making a new object.
Fields: Name, Access_Token__c(Long Text Area(32768)), Expires_In_Seconds__c(Number(18, 0)), ConsumerKey__c(Text(255)), ConsumerSecret__c(Text(255))
Now let’s go ahead and make an Aura component:
Paste the below code snippet to generate a simple access code and exchange it to get an Access Token:
QuickbooksIntegration.cmp :
<Aura:component controller=”QuickbooksIntController”>
<Aura:attribute name=”isNotAuth” type=”Boolean” default=”true” />
<Aura:attribute name=”isAuth” type=”Boolean” default=”false” />
<Aura:attribute name=”clientKey” type=”String”/>
<Aura:attribute name=”clientSecret” type=”String”/>
<Aura:attribute name=”redirectURI” type=”String” />
<Aura:attribute name=”companyId” type=”String” />
<Aura:attribute name=”scope” type=”String” default=”com.intuit.quickbooks.accounting com.intuit.quickbooks.payment”/>
<Aura:attribute name=”isAuth” type=”Boolean” default=”true” />
<Aura:registerEvent name=”Custom_Toast” type=”c:Custom_Toast” />
<Aura:handler name=”init” value=”{!this}” action=”{!c.doInit}” />
<c:Custom_ToastCmp/>
<Aura:if isTrue=”{!v.isNotAuth}”>
<div class=”slds-align_absolute-center”>
<div class=”slds-p-bottom_large slds-p-left_large” style=”width:500px”>
<lightning:input name=”clientKey” label=”Client Key” value=”{!v.clientKey}” />
<lightning:input name=”clientSecret” label=”Client Secret” value=”{!v.clientSecret}” />
<lightning:input name=”scope” label=”Scope” value=”{!v.scope}” />
<div class=”slds-align_absolute-center”>
<lightning:button variant=”destructive” label=”Connect to Quickbooks” onclick=”{! c.authorizeController }” />
</div>
</div></div>
</Aura:if>
<Aura:if isTrue=”{!v.isAuth}”>
Successfully Authorized with company having Id : {!v.companyId}
</Aura:if>
</Aura:component>
QuickbooksIntegrationController.js
Here change the redirect URL with the app URL.
({
doInit : function(component, event, helper) {
component.set(‘v.redirectURI’,’https://chobbar-dev-ed.lightning.force.com/c/TestApp2.app’);
console.log(‘redirectUri>>>>’,component.get(‘v.redirectURI’));
var sURL = window.location.href;
if(sURL.split(‘code=’)[1] != null){
component.set(‘v.isNotAuth’,false);
helper.completeAuthHelper(component, event, helper);
}
else{
component.set(‘v.isNotAuth’,true);
component.set(‘v.isAuth’,false);
}
},
authorizeController : function(component, event, helper) {
helper.authorizeHelper(component, event, helper);
},
})
QuickbooksIntegrationHelper.js
({
authorizeHelper : function(component, event, helper) {
let requestoAuthURL = ‘https://appcenter.intuit.com/connect/oauth2?response_type=code&client_id=’+component.get(‘v.clientKey’)+’&redirect_uri=’+component.get(‘v.redirectURI’)+’&scope=’+component.get(‘v.scope’) + ‘&state=security_token%3D138r5719ru3e1%26url%3Dhttps://www.mydemoapp.com/oauth-redirect’;
console.log(‘requestoAuthURL>>>>’,requestoAuthURL);
var action1 = component.get(‘c.saveKeyAndSecret’);
// var sURL = window.location.href;
// var accescode = sURL.split(‘code=’)[1];
action1.setParams({
clientId : component.get(‘v.clientKey’),
clientSecret : component.get(‘v.clientSecret’),
});
action1.setCallback(this, function (data) {
var state = data.getState();
console.log(“State>>”, state);
if (state == ‘SUCCESS’) {
let retVal = data.getReturnValue();
console.log(“retVal>>”, retVal);
}
}); $A.enqueueAction(action1);
window.location.href = requestoAuthURL;
},
completeAuthHelper : function(component, event, helper) {
try {
var action = component.get(‘c.getAuthDone’);
var sURL = window.location.href;
var accescode = sURL.split(‘code=’)[1];
var comId = sURL.split(‘realmId=’)[1];
component.set(‘v.companyId’,comId)
console.log(‘companyId>>>>>’,comId);
action.setParams({
authCodeFromURL : accescode.substr(0,accescode.indexOf(‘&state’)),
redirect_URI : component.get(‘v.redirectURI’)
});
action.setCallback(this, function (data) {
var state = data.getState();
console.log(“State>>”, state);
if (state == ‘SUCCESS’) {
var retVal = data.getReturnValue();
console.log(“retVal>>”, retVal);
if(retVal){
component.set(‘v.isAuth’,true);
}
else{
console.log(‘An error occurred’);
}
}
}); $A.enqueueAction(action);
}
catch (error) {
console.log(error);
}
}
})
QuickbooksIntController.cls
In this code, change the custom object name(LinkedIn_Information__c) with the API name of the object you created earlier.
public class QuickbooksIntController {
@AuraEnabled
public static Boolean saveKeyAndSecret(String clientId, String clientSecret){
try {
List<LinkedIn_Information__c> quickInfo = new List<LinkedIn_Information__c>();
quickInfo = [Select Id,ConsumerKey__c,ConsumerSecret__c FROM LinkedIn_Information__c Where Name = ‘QuickInfo’ LIMIT 1];
if(quickInfo != null && quickInfo.size() > 0){
quickInfo[0].ConsumerKey__c=clientId;
quickInfo[0].ConsumerSecret__c=clientSecret;
update quickInfo;
}
else{
LinkedIn_Information__c linfo=new LinkedIn_Information__c();
linfo.Name = ‘QuickInfo’;
linfo.ConsumerKey__c=clientId;
linfo.ConsumerSecret__c=clientSecret;
quickInfo.add(linfo);
insert quickInfo;
}
return true;
} catch (Exception e) {
throw new AuraHandledException(e.getMessage());
}
}
@AuraEnabled
public static Boolean getAuthDone(String redirect_URI, String authCodeFromURL){
try {
String accessToken_Endpoint = ‘https://oauth.platform.intuit.com/oauth2/v1/tokens/bearer?’;
List<LinkedIn_Information__c> quickInfoList = new List<LinkedIn_Information__c>();
quickInfoList = [Select Id, Name,Access_Token__c,Expires_In_Seconds__c, ConsumerKey__c,ConsumerSecret__c FROM LinkedIn_Information__c Where Name=’QuickInfo’];
System.debug(quickInfoList);
// String authCodeFromURL = ApexPages.currentPage().getParameters().get(‘code’);
System.debug(authCodeFromURL);
Http http = new Http();
HttpRequest httpReq = new HttpRequest();
HttpResponse httpRes = new HttpResponse();
String requestTokenBody = ‘code=’+authCodeFromURL+’&grant_type=authorization_code’+
‘&client_id=’+quickInfoList[0].ConsumerKey__c+’&client_secret=’+quickInfoList[0].ConsumerSecret__c+
‘&redirect_uri=’+redirect_URI;
System.debug(‘#### authCodeFromURL ‘+authCodeFromURL);
System.debug(‘#### requestTokenBody ‘+requestTokenBody);
httpReq.setMethod(‘POST’);
httpReq.setEndpoint(accessToken_Endpoint);
httpReq.setHeader(‘Content-Type’, ‘application/x-www-form-urlencoded’);
httpReq.setBody(requestTokenBody);
httpRes = http.send(httpReq);
System.debug(‘httpRes.getStatusCode()’ + httpRes.getStatusCode());
if(httpRes.getStatusCode() == 200){
Map<String,object> TokenInfo = (Map<String,object>)JSON.deserializeUntyped(httpRes.getBody());
LinkedIn_Information__c linkedlnInfo = new LinkedIn_Information__c();
linkedlnInfo.Access_Token__c = String.valueOf(TokenInfo.get(‘access_token’));
linkedlnInfo.Expires_In_Seconds__c = Double.valueOf(TokenInfo.get(‘expires_in’));
linkedlnInfo.Name =’JiraInfo’;
if(quickInfoList!=null && quickInfoList.size() > 0){
linkedlnInfo.Id = quickInfoList[0].Id;
}
upsert linkedlnInfo;
return true;
}else{
return false;
}
}
catch (Exception e) {
throw new AuraHandledException(e.getMessage());
}
}
}
Next, put this Aura component in an app and preview the app from the Developer Console. On clicking preview, you will get the following screen:

Enter the client key and secret that you got from the app created earlier. Also, here the scope is entered by default and if you want to change the scope, you can change the value according to your requirement. On entering the credentials, you will get redirected to the QuickBooks login page, where you have to enter your login credentials. After entering correct details, press Enter, and you will again get redirected to the App page. Now you will notice that in the URL there are parameters appended at the end. And if you see the following screen, then you got successfully authorized.

4. Hitting Different API Requests
Now, by using the above company Id and Access Token you can hit different API requests and extend your Aura component accordingly. The company Id is stored in an attribute and the Access Token is stored in the custom object’s record that we created earlier. Refer to the following link for different API references.
Next, we will delve with Quickbooks Webhook.
What Is Quickbooks Webhook?
Webhooks are notifications about QuickBooks entities sent to developer-created applications.
If you wish to get notified when a customer’s information changes, you may configure a specific endpoint that QuickBooks can call for this event with the details of the change.
When webhooks are active, data for the requested event is aggregated and then sent in a periodic notification to your call-back URL or service. Once you have configured webhooks, you will receive event notifications for all companies your app is connected to.
| Note: Only when you have a valid OAuth connection with a company, your webhooks endpoint will receive the webhooks for that company. |
Configuring Webhooks
You can enable webhooks on a per-app basis via the Webhooks section under Development or Production. See a full list of entities and operations supported here.
There are two webhooks sections: webhooks for development and webhooks for production. The former is for testing in your development setup, while the latter is for use with your app, once released to production. Make sure to configure both appropriately. For both development and production, webhooks will fire in real-time. However, for production, developers can configure for how long Intuit should aggregate events for their application to 0 Minute (real-time), 1 Minute, 3 Minutes, or 5 Minutes. The default is the 0 Minute(real-time). However, this aggregation may get delayed during peak times.
- From your My Apps dashboard, click
the app you wish to configure.
- Click the Webhooks section under
Development or Production.
3. Enter your endpoint URL in the field
provided. This URL must be exposed
over the internet and secured via HTTPS. Note: Make sure that your specified domain has intermediate certificates installed to complete the chain of trust. Self-signed certificates are not supported.
3. Click show webhooks, as shown in the
below figure to view webhook events.

4. Check the events desired (or ENTITY to enable all of them), as shown in the below figure.

- Click Save. It may take up to five
minutes for your endpoint to receive
its first notification.
| Note: When you are testing webhooks with your app, you must configure webhooks in the sandbox environment. Your app must have gone through OAuth flow and authorization with a sandbox company before events will be received. Once you are ready to go to production, you must configure webhooks again on the production side. |
Quickbooks to Salesforce Integration:
We can transfer data from Quickbooks to Salesforce using webhooks rather than using rest API requests that will hit after every interval. Webhooks get fired whenever an event is triggered. You can view Webhook-supported events by clicking here. Now, to connect any webhook with Salesforce, you follow the below steps. In addition to the steps mentioned above in the Configuring webhooks section.
In the above section, in step 3, we have to enter a publicly accessible URL and in Salesforce, we have sites that can be accessed by anyone with the URL of that site. So, if you don’t have a site, then first create it by following the below steps:
- Go To Setup->Click on Quick Search Bar->Type Sites in the search bar.
- Create a custom domain first.
- Click on New to create your site after creating a domain.
- Set all the details in the site like Site Label, Site Name, Active Home Page, etc.
- When your Site is ready then Activate your Site.
Thus, with the help of the site, you can easily call your Apex services from a third-party website without a login Id and Password.
Apex Web Services
You can perform Rest and Soap web service operations through Apex Classes. Make your method callable through the web. You have to give global access to all Apex web service methods. Use the Global keyword before the method name to make it globally accessible.
Basic Syntax to create an Apex class as a web service.
@RestResource(urlMapping=’/give_any_custom_Url/*’) global class Name_Of_Class{
@HttpGet // any annotation as per requirement global static Method_Name(){
// write your code here
}
}
Below Is The List Of Annotation Names
| Annotation Name | Description |
| @HttpGet | Reads or retrieves records. |
| @HttpPost | Create records. |
| @HttpDelete | Delete Records. |
| @HttpPut | Used to update existing records or create records. |
@HttpPatch |
Used to update fields in existing records. |
Now, we know all the three key concepts to integrate the Quickbooks with Salesforce Integration Task.
Follow the below steps to get info in Salesforce when we perform any event in Quickbooks:
Write an Apex Class as Web Service as shown in the below code snippet.
Code Snippet:
@RestResource(urlMapping=’/myurl/*’)
global class RestTestController {
@HttpPost
global static void CreateRocord() {
RestRequest request = RestContext.request;
Blob body = request.requestBody;
String bodyString = body.toString();
system.debug(‘=====’+bodyString);
}
}
Now to hit this Apex class from Quickbooks follow the below steps:
Click on Site Label to add the Apex class to your site by > Public Access Settings > Enable Apex Class Access > Click on Edit > Select the Apex Class from Available Apex Classes and Add the class in Enabled Apex Classes->Save.
Make URL like site-name.force.com/services/Apexrest/Apex_rest_endpoint/
For example, my URL was: https://chobbar-developer-edition.ap24.force.com/services/Apexrest/myurl/
| Note: While making a URL, remember that the URL mapping should be the same as mentioned in the Apex class. |
- Go to your Quickbook account>create a webhook(as we already created above)
- Click on create.
- Services/Apexrest/myurl/
- In the Url paste the above-created URL (like https://jiravidish-developer- edition.ap15.force.com/)
- Click on enable
- Name the webhook
- Go to the related Sandbox App and perform any event like create a customer or create an invoice.
- Go to the debug log of the site user and you will find a response with the event details there. Now it is ready to use this in any way.
Conclusion
Quickbooks is accounting software for your small business and Salesforce #1 CRM software in the world. QuickBooks with Salesforce integration provides complete visibility into the health of your and the areas of improvement. The two software works collaboratively to share data between your sales and accounting teams such as sales orders, customer information, expenses, and invoicing. The integration helps to reduce duplication of data, improves productivity and provides insights to achieve better forecasting.
Want to link complex systems and automate company operations? Get in touch with the expert team of Cloud Analogy who will offer top-notch Salesforce Integration Services to cut costs and better manage assets.
")